Tuesday, 12 April 2011

British QF 2 pdr from Britannia and Hinchcliffe

I’ve got two guns from Britannia (£2) and two from Hinchcliffe (£5).
Brittania – more details, but at the same time more clumsy, just check the shield.


Two versions from Hinchcliffe, shooting and towed – more slender but worse in detail.
Due to the fact that the crew removed the wheels when before shooting, you will need two variants, one shooting and one wheeled. Advantage to Hinchcliffe that have both variants.
I’ll just have to paint them… when I have figured out which paints to use.


Oh, by the way, QF stands for Quick Fire.

Monday, 11 April 2011

Bofors 37mm anti-tank gun from SHQ

Bofors 37 mm anti-tank
This model comes from SHQ Miniatures (£4,50) and you’ll find it amongst their Polish stuff. Good details, but it is made of rather soft tin, so I had to pin one of the ‘legs' when it decided to live its own life. It’s darn thin and the pinning was really fiddly.
This gun will serve in the 1939-40 Winter War, obviously on the Finnish side.
Painted in Vallejo 888 Olive Grey and then unevenly with white paint. Finished with a wash of Devlan Mud and of course matte varnish.


It could have been finished now, but why do something in a simple way…?
I want to do something like the camouflage seen in the excellent film Winter War/Talvisota. In the film some soldiers push a Bofors-gun through the woods, and fire a shot against a T-26, and then they quickly drag it away. That gun is wrapped in white cloth to break up the silhouette.
But how to do this in 20mm?

More on this later.

Sunday, 10 April 2011

French Hotchkiss 25mm anti-tank gun from Hinchcliffe

French 25mm Hotchkiss anti-tank gun
This one is from Hinchcliffe too, just like the artillery, but much higher quality. Recommended.
I painted it with Vallejo 975 Military Green, dry-brushed with a lighter green and topped off with some pigments.
Here we have another of these guns I finished last year. The crew is a mix, three men from Battlefield Miniatures (lovely models!), one (in the back to the left) is from Caesar’s French infantry, and one, not seen in this picture, is a modified Airfix WWI French infantry-man that originally releases a pigeon.

Monday, 4 April 2011

French 75mm artillery from Hinchcliffe

This years goal is to finish as much as possible from the tin- and plastics-mountain, and as a part of that I checked the box of 20mm WWII-tin.
I found a couple of bags with guns, wining for paint.

French 75mm Canon de 75 modèle 1897
I found two bags from Skytrex/Hinchcliffe, bought for £5 apiece.
They were made of quite a lot of tin… meaning a lot more than was necessary. Terrible cast.
After some cleaning the result was decent.
French equipment was painted in a variety of possible and impossible ways, and I tried to get a militaristic look different from British and German equipment.
I painted the guns with Vallejo 887 Brown Violet, and dry-brushed with 886 Green Grey. As dust I used Vallejo pigment Dark Yellow Ochre, and soot at muzzle was MIG Black smoke.
I’m pleased with the result, especially considering what I started with.


More guns to come.

Tuesday, 29 March 2011

Cardboard-buildings - Brewery

Now, this doesn’t sound at all exciting, but the results are better than expected.
A year ago or so I bought a couple of card-building from Metcalfe, and they turned out to be perfect additions to the small town of Les Attaques in the France 1940 participation game we played at Stockholms Spelkonvent.
I have bought a couple of factory buildings, that will be used in France 1940 and -44, and Germany 1945.
I started with this one, a brewery.
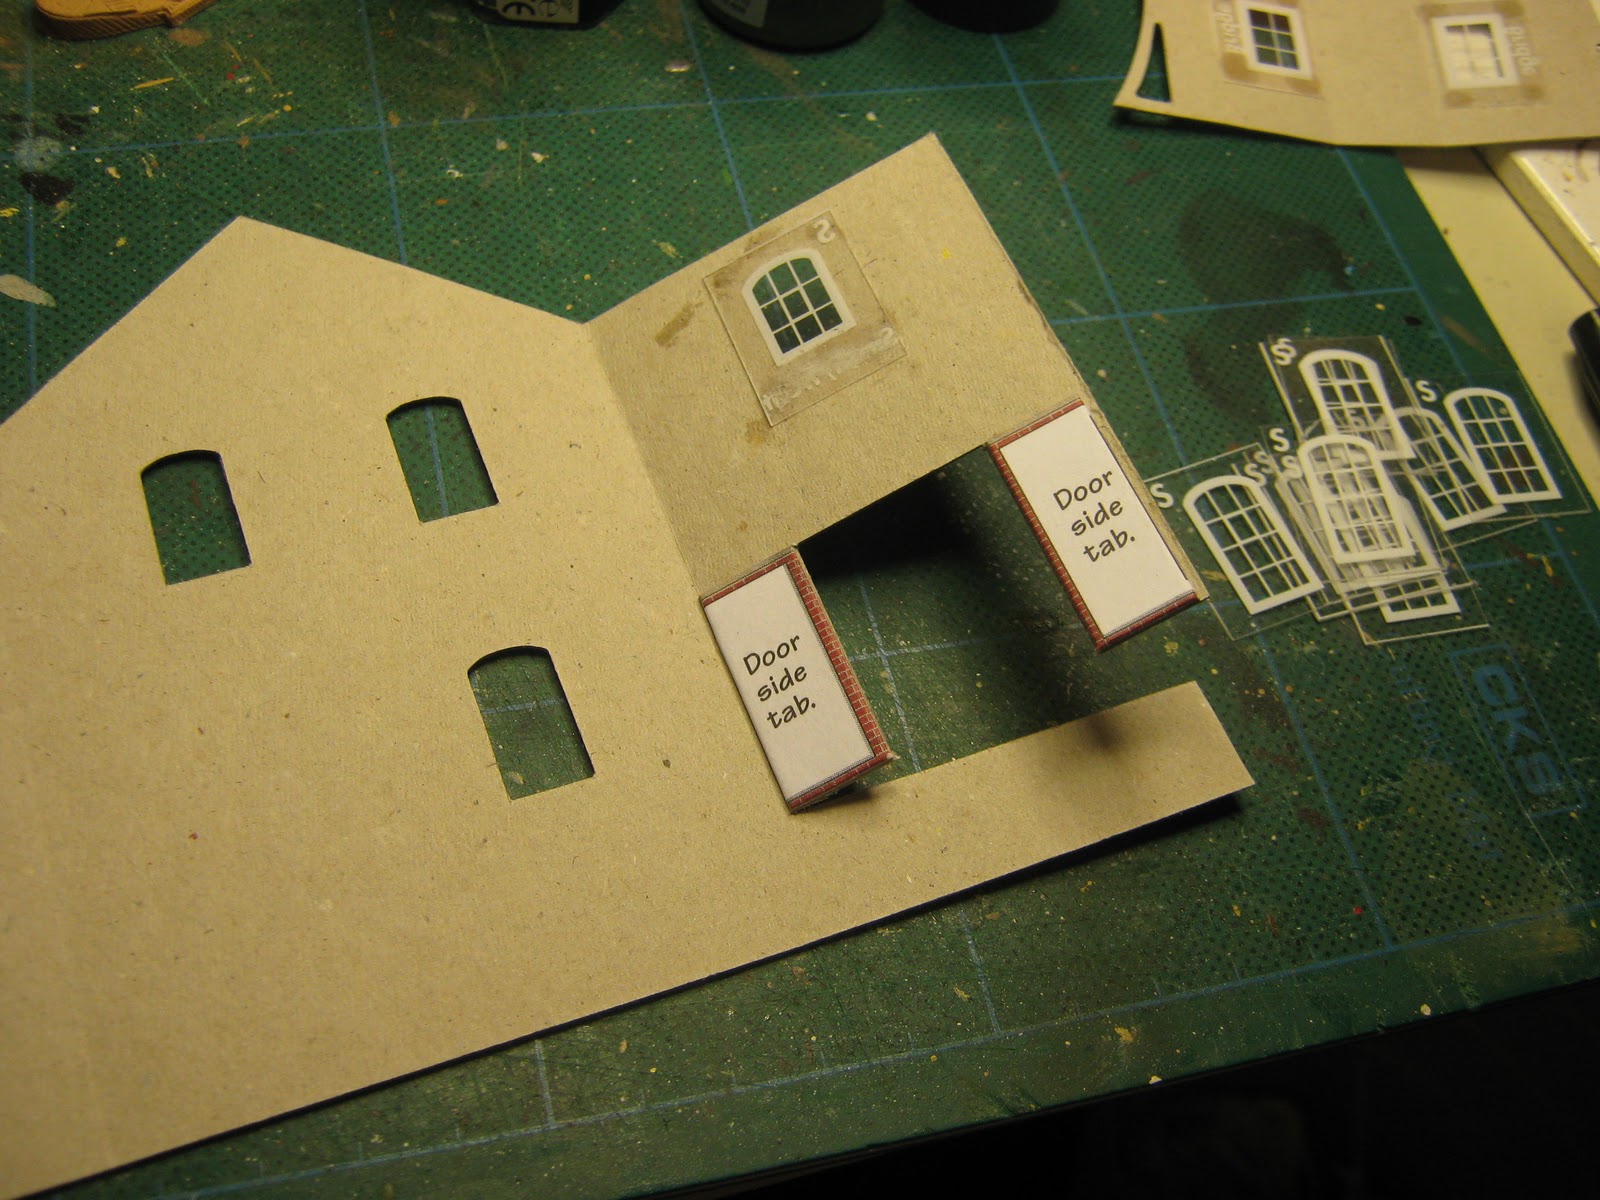
The kit comes as rather thick ready cut card, where you free the individual parts with a few short cuts with a sharp knife.
Then you use your white glue to glue it all card together, and I glue the ‘windows’ with super-glue gel (Loctite Super Attack Flex Gel).
Finished in a couple of evenings, and an outstanding result. Highly recommended!
I’ve got a couple of more sets to be finished soon.

Thursday, 24 March 2011

Hanomags

The German half-track Sd.Kfz. 251 was often called Hanomag, the name of the largest producer of it. I need quite a lot of these for early war, so I essentially need the models A, B and C and the variant /1, the base-model with machine guns.


Armourfast
Armourfast has this all new 251/1 C in 1/72 scale, fastbuild and two to a box. These kits are very simple, wheels and tracks in one piece per side and overall little detail. It is fastbuild, but that can be OK when you’re about to game with them.
Some irritating details:
-The fenders have no decent pegs to make them jack into the correct position, and this is especially noticeable in the front above the front wheel. Be careful to get them in the correct position.
-The crew compartment is very basic, don’t expect driver’s seat or anything like that. The positive aspect of that is the fact that you don’t need a driver, but it will be noticeably empty in front.
-The vision slits needs to be glued in place, but be aware that they are different in front and on the sides! I didn’t do that until the glue had set on my first vehicle.
-Why on earth do they have just a MG 42 in an early half-track? They might at least have had a MG 34 as an option, but no. For these Hanomags I grab the two MG 34:s from the weapons sprue that came with Caesars 150 mm infantry gun, but every vehicle needs two machine guns, so I have to find more. Many more.
-No decals. I get registration numbers and German crosses from Skytrex decals.
Two Hanomags, Revell in the front and Armourfast behind it.
Revell/Matchbox
I have bought four 251/1 B in 1/76 scale from Revell, and they are the same as the old Matchbox-models from my childhood. I built two of them.
A difference in size between 1/72 and 1/76


These are essentially very fine sets if you want to game with them. Decent detailing and not to many fragile pieces. Included is a machine gunner and one soldier jumping off the side of the Hanomag, and, as usual with these old Matchbox sets, a small diorama. I’ll keep the ruins for future projects.
The tracks are made of soft plastics. To get them to sag and look more natural I drill two holes slightly above the wheels on each side, apply the tracks over the ready painted and varnished wheels, and push the tracks down with a pair of pliers while I push brass rods into the holes I drilled before. A drop of super glue and some gun-metal paint on the pins, and we’re finished.
Some irritating details:
-No driver… why on earth is the driver’s seat empty? Oh well, I make a major amputation on a spare soldier and that is fixed.

Crew compartment filled with stuff, or not.
-Wrong machine-guns again. For this model it is even more annoying as several of the versions they have decals for are earlier than the MG42. Where do I find more than ten MG34? 
Conclusion: Both kits will function in a war-game. They have slightly different sizes, they are after all of different scale, but if used in different platoons I think it will be OK.
I have two more Revell kits waiting for glue and paint, and I just bought two model B from Fujimi. The Fujimi kits can be made as either /1 or /10, the platoon-commander version with a 37mm gun. I’ll be back with more information on them.
I found the Fujimi kits at Hobbybokhandlen on Pipersgatan, Kungsholmen, Stockholm. An excellent shop if you’re interested in militaria. They've got model kits, paints, books etc.
Bromma Hobby is the place where I bought the Armourfast kits, and they have stuff from a lot of other brands, such as Caesar, Pegasus, The Plastic Soldier Company and more.
News June 2011: I read that The Plastics Soldier Company will release a kit with early 251/1:s. It’s a must buy for me.


There are not that many producers of these early models, but far more of the later model D.
My goal is to get eight 251/1 and maybe one 251/10, the command-model armed with a 37mm gun.


Thursday, 10 March 2011

More bocage

I had a bocage-building spree before last week-ends’ game, and this time I used hamster bedding as leaves.
I bought hamster bedding, that is wood shavings, in the local pet-shop. Far too much bedding, I might add, as you won’t need all that much. I mixed bedding, water and olive-green textile pigment in a steel bucket and let it stand for two days, mixing now and then. I let surplus water drip off and tipped the bedding onto a couple of newspapers, to let it dry a couple of days, until dry.
I followed the instruction in the article in Battlegames. Result: Epic Fail! The shavings were far to big, which I should have been able to figure out immediately. Into the waste basket.
The box with enormous leaves moved to the kitchen and food processor (Note: No wife should be present at this stage. That is also applicable to girlfriends/mothers etc). After some experimentation the “leaves” were in a decent size.
Lots and lots of leaves!

Next try was also according to the article. I dipped some rubberized horse-hair in diluted green paint, and dipped that into the hamster bedding. That went directly to the waste basket.
A new try, now I brushed diluted white glue onto the horse-hair and dipped it in bedding.
Success!

After that the assembly line started, and I got 15 lengths of bocage, sprayed with GW Purity Seal to fix the greenery.
They looked great on the gaming table and effectively stopped my American armour and infantry.
I will make much more bocage in the future, including sections flattened by tanks or blown up, gates, sections with trees etc.

My prior adventures here.