Showing posts with label 3D-Printing Review. Show all posts

Sunday, 12 May 2019

3D-Printing Review: Wailing Tower from Thunder Chrome 3 kickstarter


Thunder Chrome has a kickstarter just now, Thunder Chrome 3: Highway to Castle Painskull, where you’ll get files for modular epic-sized buildings and catwalks between them.
I kindly got some pre-release files for review-purposes before the campaign and when I started looking at them my first thought was “Whatever will I use this for?” I printed some (the top three pieces of the tower) and realized that they look great, the fit between the pieces are perfect and that there are quite a lot of possibilities here.
I painted those while I printed pieces for the lower part of the tower (floor, two arches and two walls with circular windows). Painted those and realised that I really like this set. Now I had to have an even higher tower, so I printed four supports, the legs that lift the tower, and another floor. When I was at it I printed the three-piece stairs also, as our heroes have to be able to reach the upper floors.
I use a really basic paint-scheme: Army Painter Rough Iron as a base, drybrush with AP Plate Mail Metal. Details painted AP True Copper and Vallejo Bronze.
I still haven’t painted the supports or stairs, as I used up all Rough Iron and need to buy more. Got a cold that has floored me for a couple of days now, preventing me from visiting my Friendly Local Gaming Store. 
I am thinking about printing a balcony for the tower and maybe some of the catwalks, connecting this piece to other buildings.
So, what will I use it for? My first thought was Frostgrave, where it will look smashing. From Frostgrave the jump to Ghost Archipelago is a short one. In both, a treasure or two in the top-floor would be suitable.
Then I thought about Pulp Alley, where a scenario around a mad scientist holed up on the top floor during a thunderstorm does have certain attractions. Combine that with an operating table on which a lifeless body lies, connected to the spire (which, by the way, is the front of an Amraam missile from the parts-box) with wires. Hurry before the golem wakes up! Yep, definitely a scenario here.
So, there are all sorts of uses for this, and I have just started exploring them. I’m really happy with this.
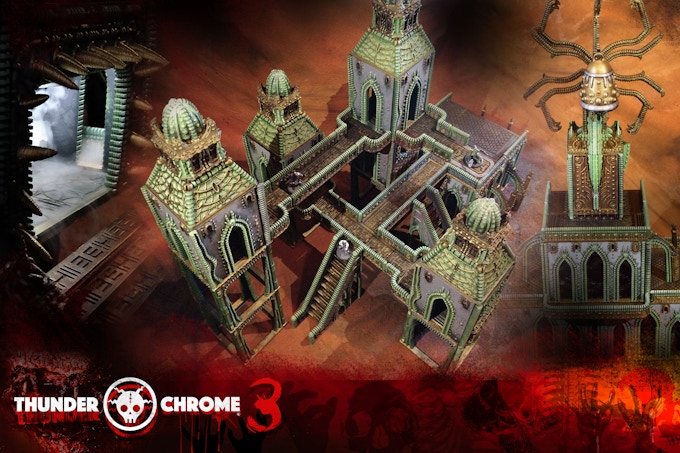
© Thunder Chrome and used with permission
The verdict:
It’s different, fit is excellent, it paints up easily and the end-result is eye-catching. What’s not to like?  Great stuff!
© Thunder Chrome and used with permission
Do check it out before the kickstarter ends on May 27 2019. There is a free samples pack on the Kickstarter page if you want to ge a feel of it all before taking the plunge.

See more 3D-printing reviews here.
Look here if you want to explore what 3D-printing crowdfunding projects are live just now.

Wednesday, 1 May 2019

3D-Printing Review: Death Werewolf from Printed Obsession


Printed Obsession kindly sent a couple of pre-release files from their Hell Hath No Fury kickstarter for me to try out, and here is one of them.
This, a Death Werewolf, is actually a first for me, as it is the first figure I have printed. It looked daunting to say the least. Lots of details.
I sliced it in Sli3r, layer height 0.07 with supports. Printed in a Prusa i3 MK 3 with a generic filament (from Clas Ohlsson).
What came out after two and a half hours looked like a lump of plastic, but after I had removed all the support material something resembling a black werewolf emerged. I hit it with a short blast from a heat-gun to melt flimsy pieces of stray plastic.
After painting it looks like a great playing piece from a normal arms-length (or in the pics here). In a close-up pic (like when you click on these pics to get a full-size one) you can see layering but it’s not too bad, I think. 
I guess I could get better results with some practice, this is after all the first figure I have printed. I would like to try out my high-end Prusa-filament on figures, as I think that will give even better end-results. More experiments with figures will follow, especially things like zombies, as I think there is a lot of potential here.
The verdict: A beautiful mini that turned out rather well for a novice. If you have a SLA-printer you will get an excellent mini full of details, and with a FDM-printer (like mine) you’ll get at least a decent result, and probably rather good with some practice.
© Printed obsession and used with permission
Do pop over to their kickstarter, as the great-looking minis there are well worth a look, and there are some really nice terrain-pieces, too. Hurry, as the campaign closes on May 4 2019.

See more 3D-printing reviews here.
Look here if you want to explore what 3D-printing crowdfunding projects are live just now.

Wednesday, 24 April 2019

3D-Printing Review: Comms Dish from M3Studios


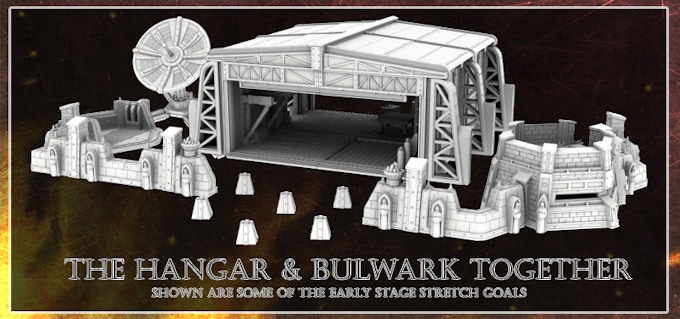
I got review pre-release files for this Comms Dish from M3 Studios latest Kickstarter: Hangar and Bulwark - Wargaming & Skirmish Printable Terrain.
It’s a rather huge beast, but I printed it in 60% scale as I wanted to use it in pulp games and maybe 7TV and something a bit smaller would suit me better. I think I see a secret beam-weapon here.
Everything is printed with 0.10 mm layer height and no supports. Total print time was around 8.5 hours and 33 grams of filament was used.
It turned out absolutely great, if I may say so. Detailing is very sharp, even on this reduced scale.
The only thing that didn’t look great was the cables between the generator and the base. When I removed the generator and cables piece the cable broke away, probably because of the reduced scale. It also looks a bit strange, which is probably due to this being pre-release and I got the files before M3Studios had printed these parts (except the dish). So I expect this to be rectified on release.
All in all, I’m very happy with this. A useful scenery-piece, great detailing and everything fits together really well.
Do check out the kickstarter if this looks interesting, as there are lots of other very nice stuff in it. It ends on May 4 2019.
Also, take the opportunity to download a free model of a sandbag emplacement.

See more 3D-printing reviews here.

Wednesday, 17 April 2019

3D-Printing Review: Roadside Sandwich Shop from LOOT Games

I had some contact with Loot Games when they ran their Sci-fi/PostApocalyptic 3d printable playsets for wargames kickstarter in March. They kindly sent files for their Road-Side Sandwich Shop for a review, but my printer was out at the moment, and when I had fixed it the campaign was over.
Now they have revisited the old campaign in a new kickstarter and that was a great reason to make a review of the shop.
I printed it on my Prusa i3 MK3 with PLA filament. Sliced with Slic3er Prusa Edition. Layer height 0.10 mm, which is preferable if you want reasonably smooth walls. Print time was 3,5 hours for the pillar, 25 hours for the house body and 21 hours for the ceiling. If your fine with rougher walls you could go for 0.2 mm, which will halve the printing time. 0.05 or 0.07 would probably give even smoother walls but printing-time will obviously be longer. The construction weigh about 270 grams.
I does look a little too big for my minis, so if I make another one I'll probably print it in 80% scale or so.
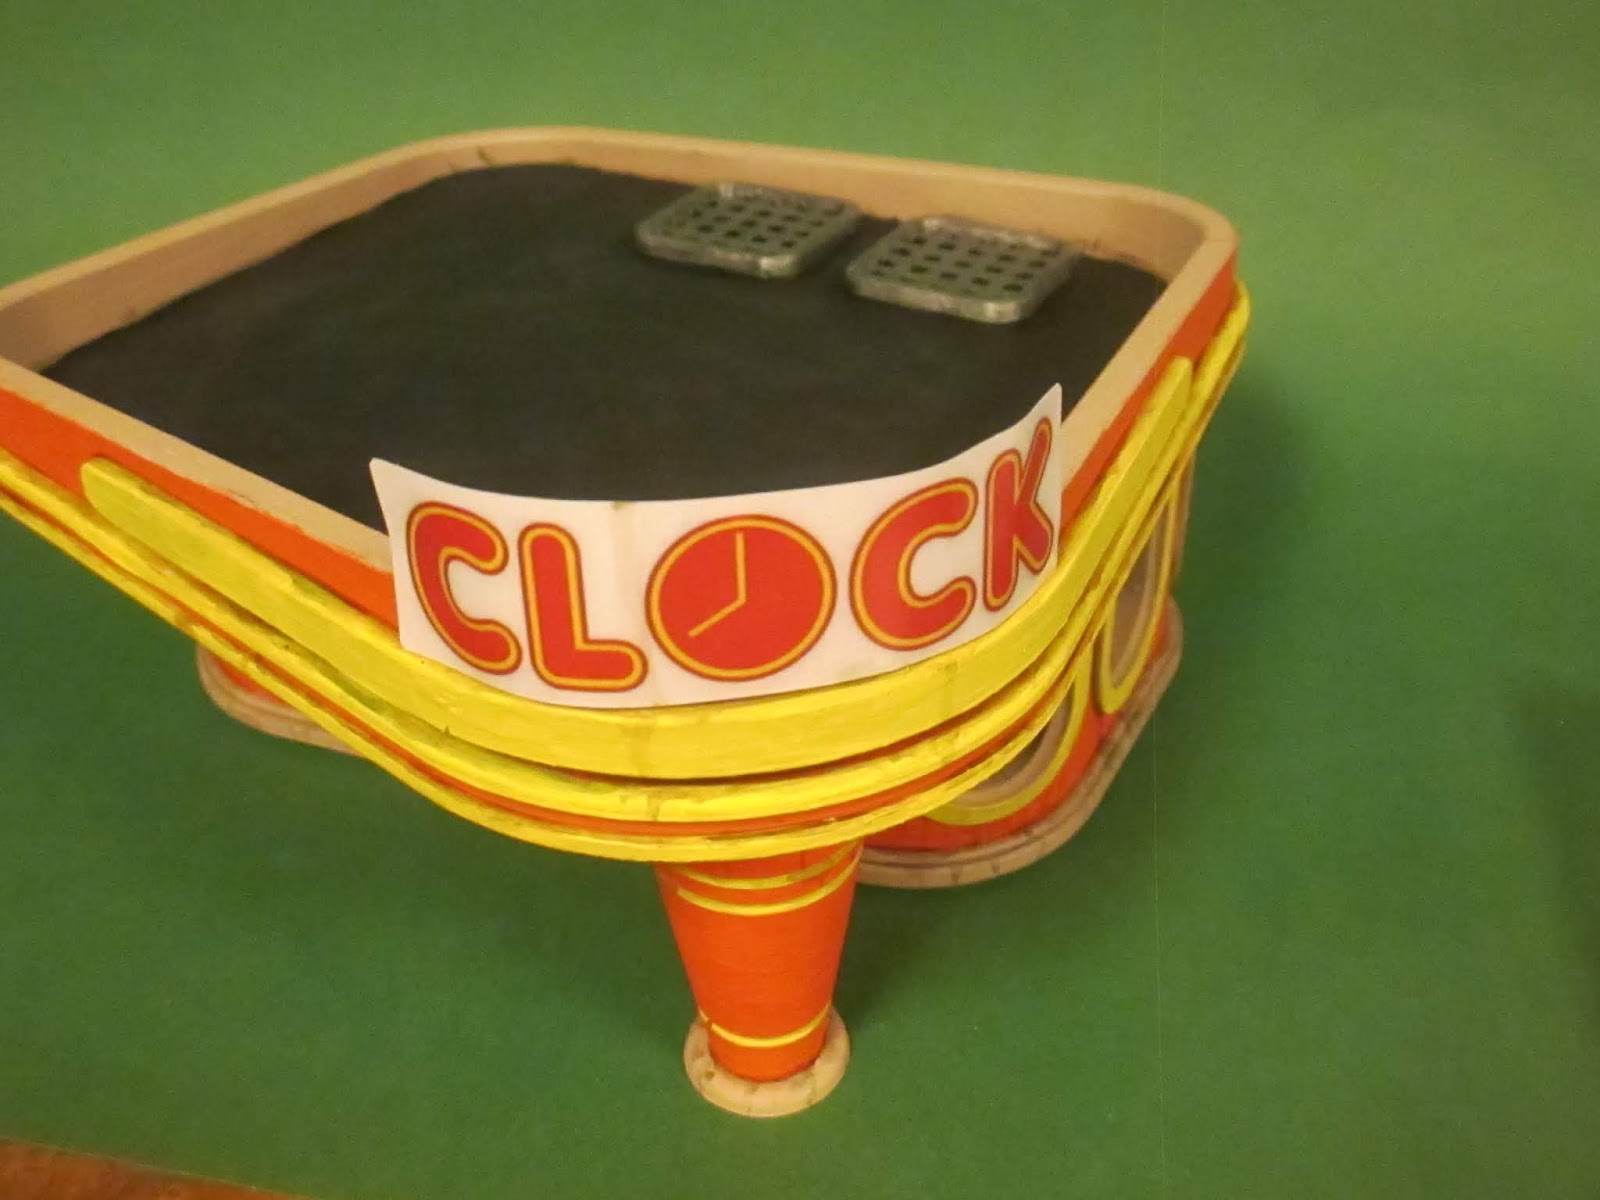
I will use the shop in our upcoming zombie-games of Hjärnor, and as that is set in Sweden in the 80’s I wanted the shop to look pre-apocalypse (or rather in-the-beginning-of-the-apocalypse), that is, not a wreck and without the big sign on the roof (I will probably design one of my own). My idea is a local burger-shop, a bit run-down. We had a chain of burger joints called Clock in the 70s and 80s, that fit the bill rather well, and a quick Google-check turned out a few useful menues and stuff.
I do need some suitable furniture for it. Faux leather sofas, plastic chairs and easy to wipe tables...
This is a great little shop that is unique in the way it looks. I really like it and the print turned out great. What’s not to like?
Pic of the shop and sign from the kickstarter, printed with 0.2mm layer height. © LOOTgames and used with permisson.
If you’re interested in this building you can pledge for it in the new kickstarter, as just the building or as part of a bundle. Check it out before it ends on April 23 2019.

Wednesday, 14 November 2018

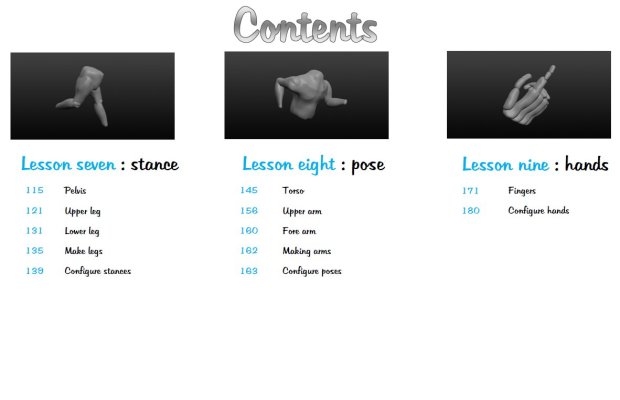
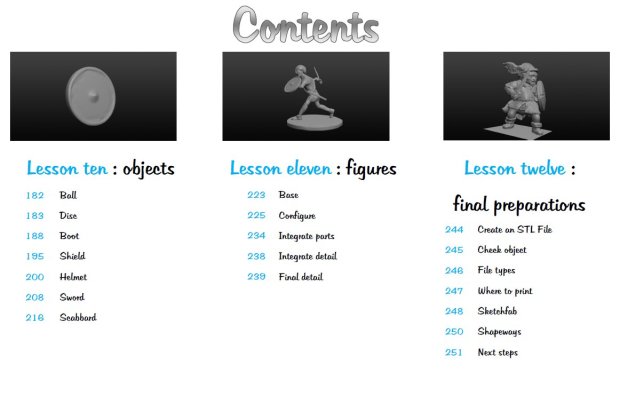
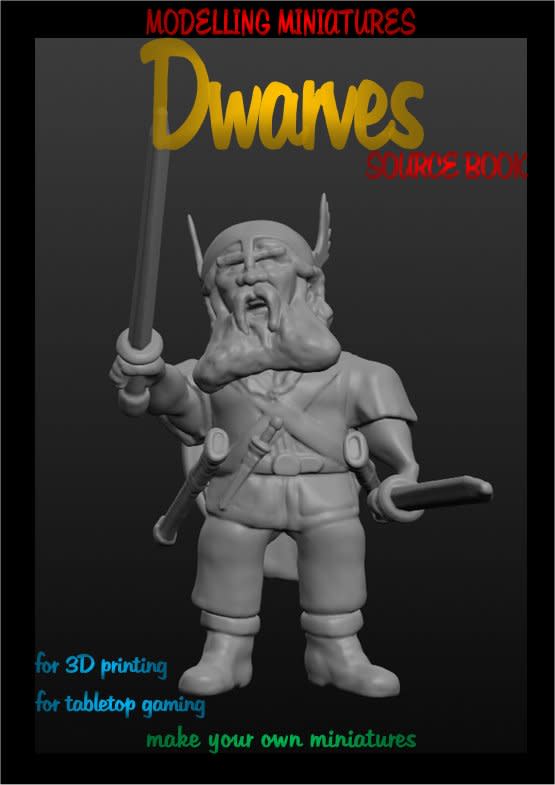
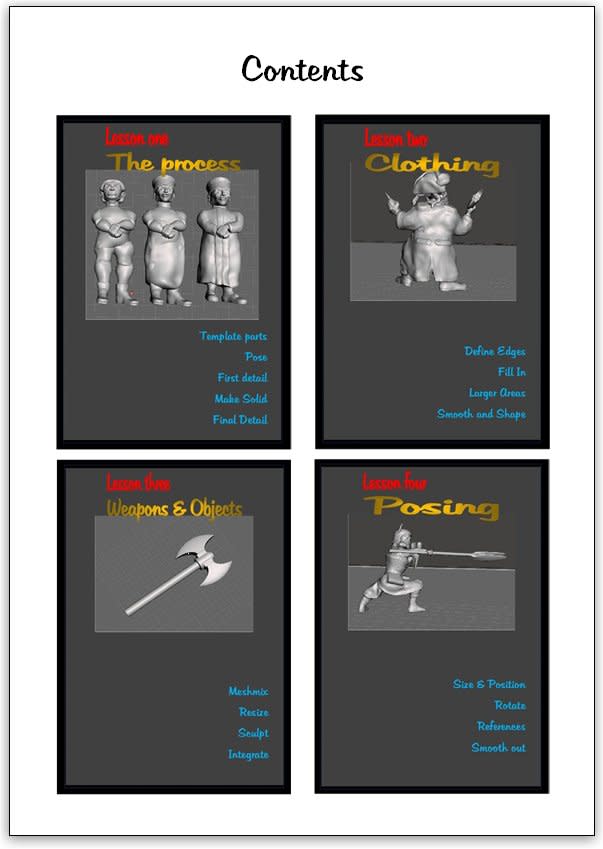
3D-Printing Review: Modelling Miniatures book


First off, I have no experience with 3D-sculpting in a computer and do very little real life sculpting, mainly with green-stuff.
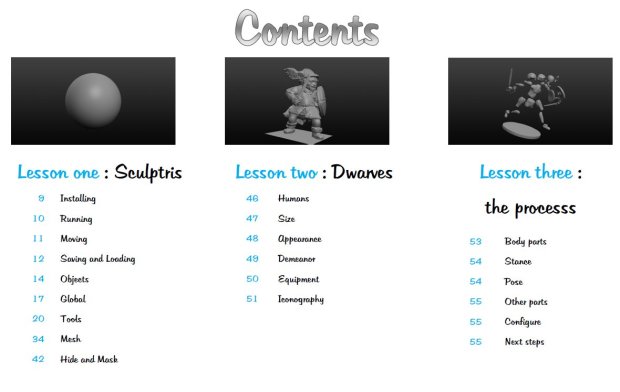
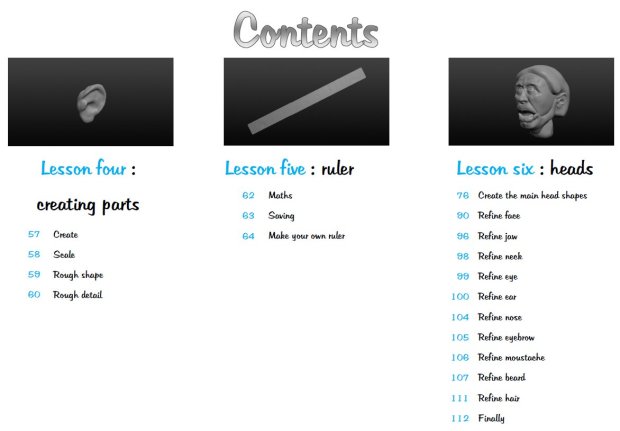
So this guide-book is very much written for someone like me, as it is a beginners guide on how to sculpt in 3D using free software.
I began by downloading the free Sculptris software, as per instructions in the guidebook. Registering, downloading and installing took less than five minutes. Five minutes well spent, as it is.
Then I just followed the guide-book and started working through the examples.
I must admit that I started with the examples, but the fun of it got me side-tracked for an hour, when I just doodled in three dimensions. Dear me, it was really fun.
After the first exhilaration I went back to the guide-book and went through more of the examples.
And it is not that hard! (Well, at least not the basics) It is actually possible to create stuff. I sure wouldn’t print anything I’ve made so far, but I see a future where I might actually produce a stl-file and load it into my printer.
I haven’t gone through it all yet, mainly because I’m fully occupied with far too much work at the moment, but I’m slowly but surely going through the book. It’s lots of fun and one thing is absolutely sure – there is no way I would have done anything 3D-sculpting without a lot of help to get started. With this guide-book I got just that help.
Great stuff, indeed. It’s a must buy if you want to try 3D-sculpting but have no, or limited, experience, as it will kick-start your efforts and flatten the learning curve significantly.
You can get this book and its sequel for only £15, as it is part of Steve Hampson’s newest kickstarter. With the two books are also files for the figures you've worked with, meaning you'll get a bunch of printable minis as part of the deal. Then you will also get two stl-advent-calendars, bringing a haul of stl-files each day from December 1 to 25. What’s not to like?
You’re in a bit of a hurry though, as the kickstarter closes on November 19, 2018.
Highly recommended!

Disclaimer - I got my copy of Modelling Miniatures as a review copy.

Wednesday, 31 October 2018

3D-Printing Review: Future Worlds: Landscapes - modular war game terrain


I received some pre-release files from Nick Fatchen/Arid Hills a couple of weeks before he started his current kickstarter. Looking at them and the information given to me made me rather enthusiastic, as I think the whole concept is great – modular terrain-pieces that click onto each other making hills, cliffs and much more.
A couple of clips and a support to get a steady hill-end.
They click together using OpenLOCK, a proven system that I use for a lot of other terrain from Printable Scenery and others.
Support to give stability. They are a bit wobbly at the moment, but I'm told another variant is on the drawing-board. I would like one with extended top and bottom.
I’ve printed some different hill-pieces and cliffs to try out, and it all works rather well. I’ve noticed that I need to clean some of the connectors, especially those  printed down towards the printer bed. It’s essentially a couple of minutes work per tile, so it’s not a big deal.
When that is done the fit is excellent.
My standard 28mm female fighter from Otherworld, taking a stroll on some well textured but unpainted cliffs. She hardly notices the gaps between the tiles.
She prefers painted, though.
There are gaps between the tiles, obviously as they are tiles, but if that doesn’t bother you then you’ll have a very versatile set of modular terrain, with everything from hills to swamps to rivers to trenches (great!) to… well, lots of other stuff also.
Oooh, painted... They will look great with some static grass. 4 inch squares, as can be seen, measured in centimeters.
I think the best way to de-emphasise the gaps is to simply paint the tiles uniformly the same way, so as to not highlighting the gaps. The pics on the kickstarter unfortunately do just that, highlighting the gaps, that is.
There is an obvious other solution, and that is to make permanent hills. You click the tiles together, glue and then fill the gaps with green-stuff or something similar. That way you can get great-looking textured hills with a minimum of fuss. You will lose the modularity though, but I think the end result could be well worth it.
2 inch stepped hill outer corner being printed. I took around 5 hours to print on my Prusa i3 Mk3, with 0.2mm layer height and using 13 meters of filament, costing around €0.60. Hill tiles are typically between €0.40 and 0.80 each, depending on type and obviously filament price. I got mine for SEK 160/€16 for 1kg/340 meters on a sale from Clas Ohlsson. They are ordinarily SEK 200.
I really like this set, and I think there are tons of applications for the tiles. I will definitely play around some more with them and will probably go for both modularity and permanent hills. Maybe a mix of the two, where I make half hills, or something like that, and put them together. There are so many possibilities.
This is really good stuff and definitely worth a look, as it is a great concept. Do check it out at Future Worlds: Landscapes - modular war game terrain on Kickstarter. You’ve got until November 8, 2018, when it ends.

They won’t become extinct after that, I’m told, as the concept will continue to be supported with new tiles and there will be a web-shop to buy it all or in parts. Stay tuned on that also, as I’ll give a shout-out when that is live.
Now it’s back to the printer. I need more edges for my hill.

Friday, 12 October 2018

3D-Printing Review: Dungeon architect - Build a dungeon in a day


I was kindly sent a bunch of review-files from the Dungeon architect - Build a dungeon in a day kickstarter.
If you read the 3D-crowdfunding watch on this campaign a while ago, you know I found this to be good idea, and having tried it out I’m more than happy with the results.
The idea here is to 3D-print your rollers or stamps and then imprint their design into a suitable medium.
I printed the roller using PLA, layer hight 0.02 mm, Infill 50% (to get it really rigid). Print time was less than four hours and I used filament for around €1.50.

XPS (extruded polystyre) foam is the recommended candidate for walls and floors.
I first tried to work on pink foam, which is high-density. That turned out to be too compact, as the stamp I tried on it just couldn’t make a good impression. So, no pink foam, which is a pity as I got loads of that.
Next was EPS, that is the ordinary expanded polystyrene, you know the very cheap, white sheets (or packaging material) built from small beads that get everywhere if you try to cut it with a blunt blade. I’ve got loads of those sheets, too.
The roller and stamp worked great on this. Okay, you see contours of the beads, but there can simply be no cheaper way to get a dungeon up and running in minutes.
If you want a really cheap dungeon made in no time, and are not so focused on the aesthetics then this is a decent candidate.
Finally, I tried to get hold of the blue XPS foam (one brand is sold as Styrofoam), which is a bit lighter in density compared to pink foam. I tried several craft shops and builders shops. It seemed impossible to get hold of thin sheets of this, so I ended with a big 5 cm thick slab. From that I carved (with a very sharp blade) centimetre wide strips and finally I imprinted these.
It took me a couple of minutes to imprint two walls and one floor-piece. A minute or two with a glue-gun to stick them together. Another couple of minutes to paint them and probably two minutes to drybrush. A sizeable piece of dungeon corridor in ten minutes or so. You can hardly beat that!
I will continue to play with this, as I also got a brick-roller, a couple of more stamps, a cutter for door-arches and a printable door. You will see a couple of builds with this, that is for sure.
Absolutely recommended if you ever need a dungeon in a hurry. Great stuff!
My gamer-son said it all when I showed the rollers and stamps to him: 
This is just so smart!"
I do hope these will be for sale in some form after the Kickstarter. I'll keep you informed on that issue.
But don't worry, there is still time to pledge on the kickstarter, as it closes on October 17.